- 17rlochhead
- 4 days ago
- 3 min read
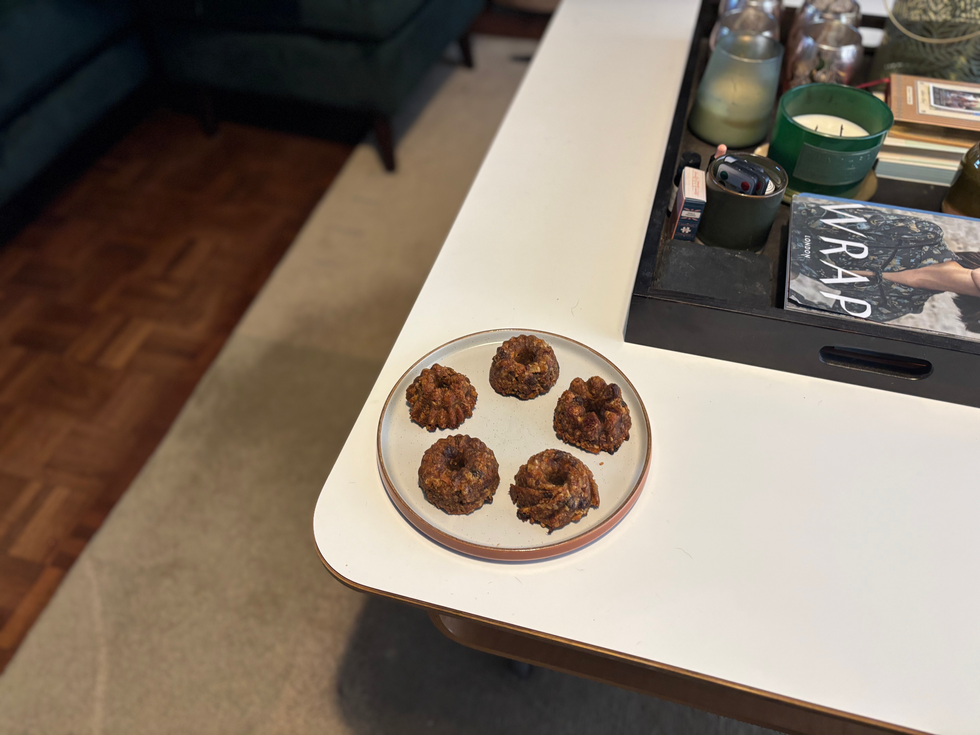
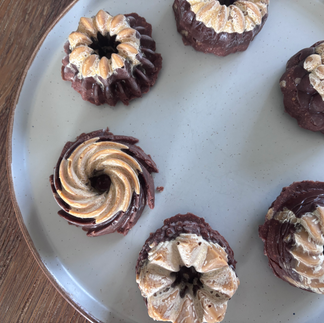
Chocolate and peanut butter have always been one of my all-time favourite flavour combinations. It strikes that perfect balance between sweet and salty, rich yet comforting. When I received some mini bundt tin moulds as a Christmas gift, they instantly inspired this recipe — and the addition of banana takes it to another level.

The banana adds a natural sweetness that beautifully balances the salty peanut butter and rich dark chocolate, while also creating a wonderfully creamy middle layer. These mini bundt cakes are made up of three simple layers that come together effortlessly: a crunchy peanut butter top, a smooth chocolate banana mousse centre, and a chocolatey shortbread base.


Even better? They’re completely no-bake and made in the freezer, so there’s no need to turn the oven on. They’re also naturally gluten-free, and can very easily be made vegan or dairy-free with a simple swap.
These little treats are perfect for meal prep too — just keep them stored in the freezer and grab one whenever you want a quick snack or an easy dessert.

Substitutions & Notes
Not a peanut butter fan? Swap it for any nut or seed butter you love.
To make these nut-free, use a seed butter instead of peanut butter and replace the ground almonds with extra oat flour.
For a vegan or dairy-free version, simply use a dairy-free milk in the mousse layer (coconut or almond milk works beautifully).
To ensure they’re gluten-free, use certified gluten-free oats, and if using oat milk, make sure it’s gluten-free too.
Ingredients (Makes 6 mini bundts)
Peanut Butter Layer
50g peanut butter
Chocolate Banana Layer
1 banana
1 tbsp cocoa powder
Splash of milk (dairy-free if needed)
Chocolate Shortbread Layer
¾ cup oat flour (made by blending gluten-free oats)
¾ cup ground almonds
2 tbsp coconut oil, melted
2 tbsp syrup (maple or agave works well)
2 tbsp peanut butter
2 tbsp cocoa powder
Method
Prepare the moulds.
Lightly grease a mini bundt cake tin with coconut oil.
Peanut butter layer.
Add about a teaspoon of peanut butter to the bottom of each bundt mould, spreading it slightly so it sits evenly.
Chocolate banana mousse
In a blender (or using a hand blender), blend the banana, cocoa powder and a splash of milk until completely smooth and creamy.
Assemble the middle layer
Spoon the chocolate banana mixture on top of the peanut butter layer in each mould.
Freeze
Place the tray in the freezer for 1–2 hours, or until the mousse layer has set.
Make the shortbread base
In a bowl, mix the oat flour, ground almonds and cocoa powder. Add the melted coconut oil, peanut butter and syrup, and mix until a thick, slightly crumbly dough forms.
Finish the bundts
Spoon the shortbread mixture on top of the frozen chocolate layer and press down gently to create a flat base.
Final freeze
Return the tray to the freezer until fully set.
Serve
Carefully remove the mini bundt cakes from the moulds. Let them sit at room temperature for a few minutes before serving.

These are one of those recipes that’s just really handy to have in your freezer. They don’t take much effort to make, there’s no baking involved, and once they’re done, you can just forget about them until you fancy something chocolatey. I like that they feel a bit special thanks to the layers, but are still simple enough to throw together without much thought. They’re great straight from the freezer or left out for a few minutes to soften slightly. If you want to stay up to date with my other new recipes and see what I've been baking, check out my Instagram @rubysgfkitchen.
Happy Baking,
Ruby x